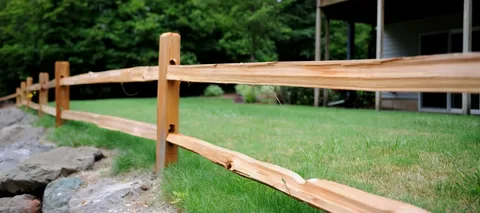
Preparing your yard can make fence installation easier. Proper preparation saves time, reduces costs, and helps prevent mistakes. Yard preparation for a fence involves researching local regulations and permits, staking out property boundaries, consulting neighbors, cleaning and leveling the ground, considering safety and access, staking out gate locations, planning for installation by a fence company, and inspecting the completed fence. Proper planning ensures that everything goes well and that you have a sturdy, attractive fence.
Essential Steps to Prepare Your Yard for Fencing
Here are the steps to prepare your yard for a fence installation.
Check Local Regulations and Obtain Permits
First, check your local regulations. Cities limit how high a fence can rise or require a permit. Some areas require special fences around pools, corner lots, or front yards. This ensures that your yard is legal and safe. You or your contractor can apply for the permit. You don’t experience any delays when taking this early step. Reviewing building codes helps you start the process correctly.
Next, make sure that your design aligns with the HOA specifications, if there are any. Some HOAs are very specific about style, height, and color. If your fence doesn’t meet the rules, you might be forced to remove it. So always read the specifications or ask for permission before beginning.
Identify Property Lines and Mark Fence Layout
Knowing exactly where your property ends is key. Use your deed or survey to find property lines. If you don’t have one, request a copy from the registry office. Or hire a surveyor to help.
Once you know the edges, mark the location of the fence. Use stakes and twine to make the line clear. Be sure to include space for posts and gates. Measure carefully. An accurate layout avoids costly mistakes.
Coordinate with Neighbors
Talk to your neighbors early if your fence is near their property. Share your plans and when you want to start. Ask if they have any worries, too. Open communication helps prevent disputes and may also provide valuable insights about underground utilities or property history. A short conversation can be very helpful. It makes the project smooth from beginning to end.
Clear and Level the Installation Area
Next, clear the area. Walk along the fence line. Look for slopes, rocks, roots, old fencing, or debris. Clear everything that could block digging or leveling.
Once cleared, level the ground. Use tools like a rake, shovel, or hoe. If the soil is hard or uneven, you may need heavier tools. Fill low spots. Remove high spots. Check with a level or tight string to get the surface straight.
Ask if your fence company handles ground prep. If not, decide whether to do it yourself or hire help.
Ensure Access and Safety During Installation
Make sure the installation crew can reach the work area easily. Move vehicles, trim low tree branches, and clear a path. This helps them bring in tools, posts, and materials.
Also, plan for safety. If you have kids or pets, keep them out of the work zone. Keep them inside or in another part of the yard during work. It keeps everyone safe and the crew focused.
Mark Gate and Entry Locations
Decide exactly where your gate or gates will go. Flag those areas off with stakes, so the fitters know. Ensure enough space for the gate to swing open and close, and for the latch. Leave room to walk through or move objects in and out. This prevents problems later.
Schedule Professional Fence Installation
Once your yard is prepped, it’s time to bring in your fence company. Look for a local, insured, experienced installer with good reviews. You can check sites like Angi or HomeAdvisor. Or ask neighbors for recommendations.
Set a date for installation. Ask if the company will mark utilities or if you need to arrange it yourself. Sometimes, they will contact the utility marking service, which is often free.
Your yard is ready on installation day. The crew can start digging without delays, and posts can be set immediately. This saves time and gets the work done in 1–3 days.
Post-Installation Inspection and Follow-Up
After building the fence, walk through the property with the installers. Make sure every detail is exactly as planned. Check for distorted posts, misaligned panels, or loose fasteners.
If debris remains, request clean-up and confirm warranty or service details. Some companies provide clean-up, small repairs, and maintenance guidance.
Set reminders to inspect your fence regularly. Check for movement, rot, or damage, and handle repairs quickly.
Conclusion
Properly preparing your yard for fencing ensures a smooth installation process and a long-lasting, attractive fence. By checking local regulations and HOA rules, marking property lines, coordinating with neighbors, clearing and leveling the area, and planning access and gate locations, you set the stage for success.
Scheduling professional installation and inspection by a fence company ensures quality work. These steps help prevent delays, disputes, and costly mistakes, leading to a successful fencing project that enhances your yard’s privacy, security, and beauty.

